
Purpose of a namespace
Namespace primarily helps you organize and manage your metadata. For example, it could help you:
- Identify custom metadata against OOTB metadata
- Identify a metadata’s source: when metadata flows-in from from multiple 3rd party systems
- In such scenario, you could easily identify the source of metadata, by mapping a namespace against the metadata’s scource.
- Filter what should be written on to an asset binary by Metadata Writeback Workflow. The DAM metadata writeback workflow would only write a metadata that has a namespace.
Registering a new name space
A namespace can be registered in AEM through multiple ways as listed below:
Via CRX Explorer:
- Visit CRX Explorer http://localhost:4502/crx/explorer/index.jsp

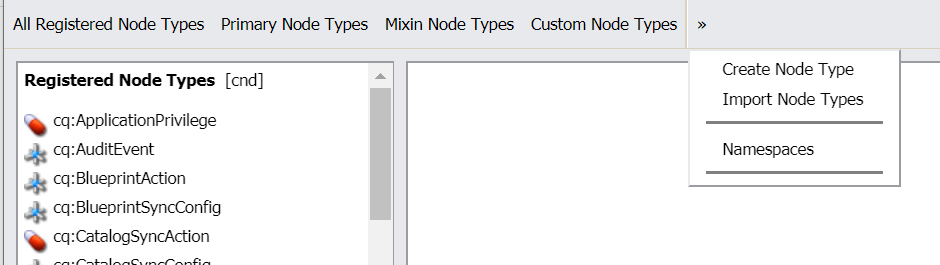
- Click on “Node Type Administration“, followed by “>>” on the toolbar, then “Namespaces“
- Scroll to the bottom of the page. Click on “New” button.
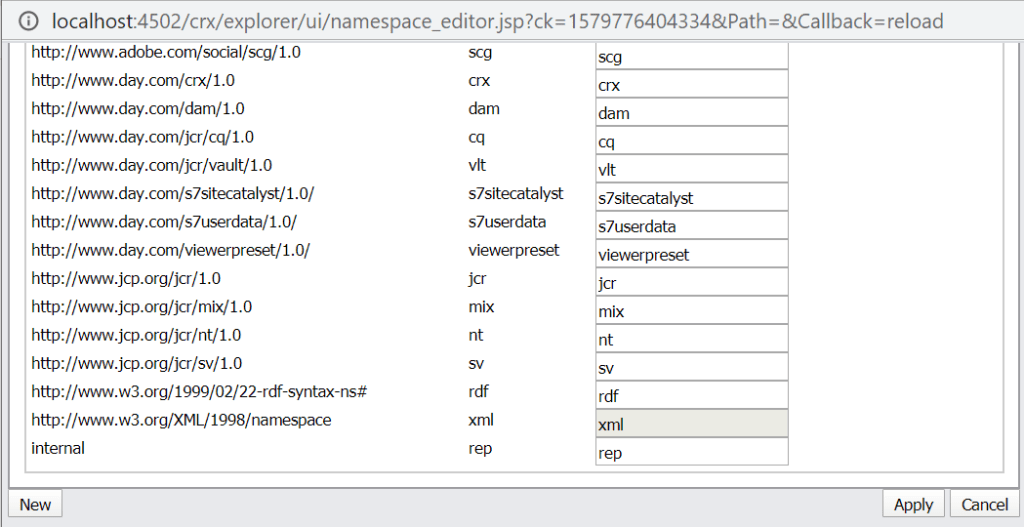
- Specify the id in the form of a URI

- Add a prefix for the id. Id is the namespace that you would append to a property name. Example: techrevel:title

- Save the config. Click on apply.
The new namespace (example: techrevel) should now be available for use.
Note: The CRX explorer way needs you to register the namespace on every system manually (Local developer’s instances and servers).
Via CND File
The CND File way has a advantage, that the namespace will be automatically registered on deploying code.
- Create a nodetypes.cnd at the location /src/main/content/META-INF/vault/nodetypes.cnd of ui.content module
- Register you namespace as shown in the example below
<'sling'='http://sling.apache.org/jcr/sling/1.0'>
<'nt'='http://www.jcp.org/jcr/nt/1.0'>
<'techrevel'='http://www.techrevel.blog'>

[sling:Folder] > nt:folder
  - * (undefined)
  - * (undefined) multiple
  + * (nt:base) = sling:Folder version
Once you deploy the code, the namespace would be available for use
Deleting a namespace
- Visit CRX Explorer http://localhost:4502/crx/explorer/index.jsp
- Click on “Content Explorer”

- Browse to location “/jcr:system/rep:namespaces”
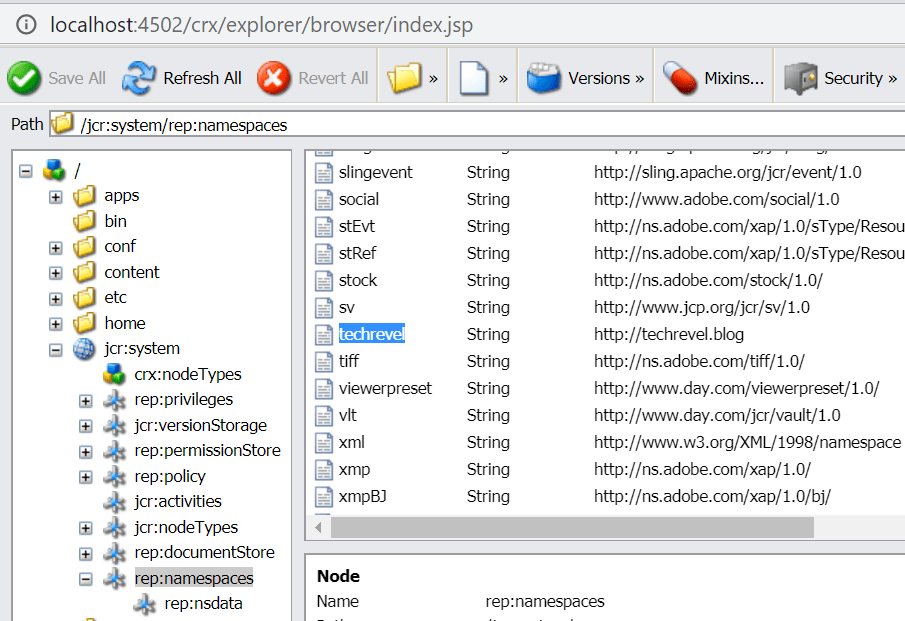
- Look for the namespace in the list displayed on clicking rep:namespaces node
- Right click the namespace. Click delete.
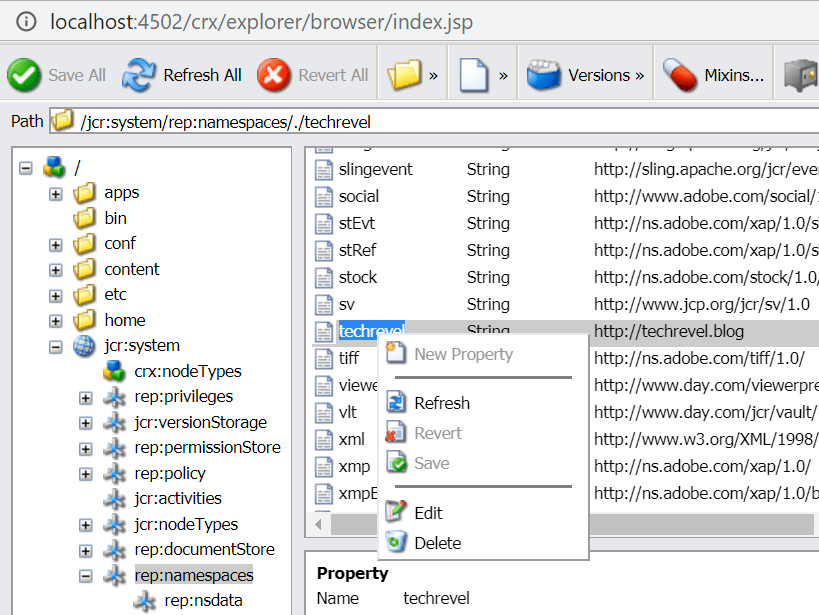
- Remember to save the changes via “Save All” button
The namespace would have been deregistered now. AEM restart is not required.

Is there any real case scenario which explains this better
LikeLike